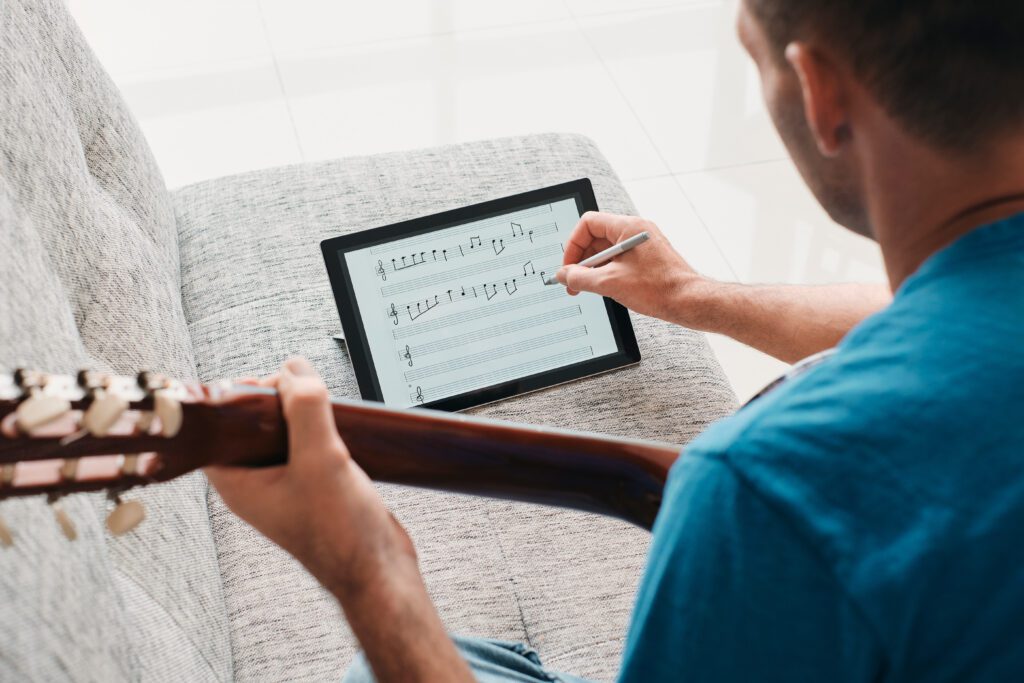
How to Read Sheet Music: A Beginner’s Guide for Absolute Beginners
Reading sheet music may look like decoding a secret code. But once you understand the basics, it becomes as natural as reading words on a page. Whether you’re learning piano, guitar, violin, or singing, knowing how to read sheet music helps you play confidently and communicate clearly with other musicians.
Let’s simplify everything and start from the very beginning.
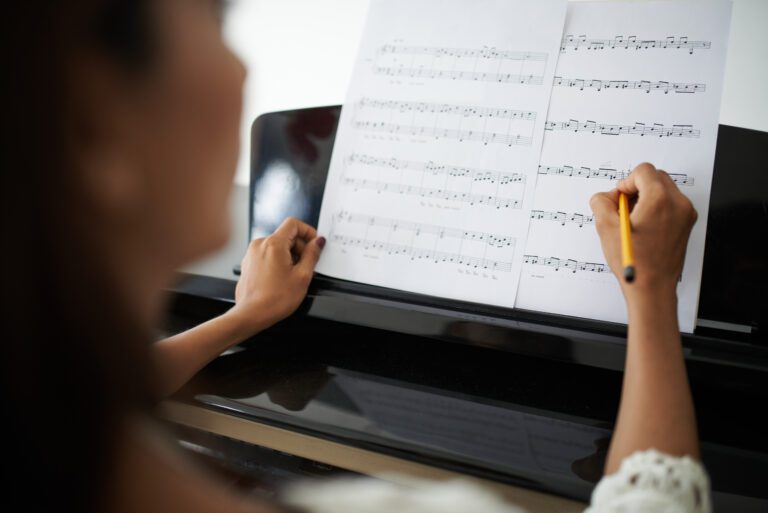
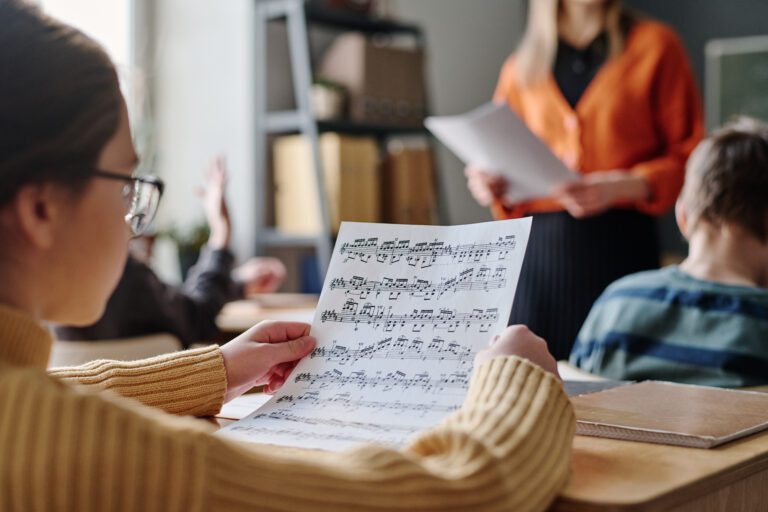
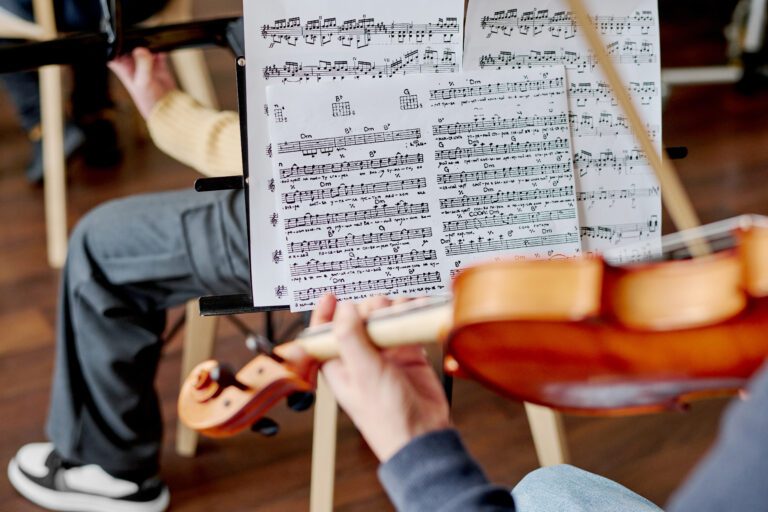
📄 1. What Is Sheet Music?
Sheet music is a written form of musical notation. It tells you what notes to play, how long to hold them, and how fast or slow the music should go. It’s like a map for your musical journey.
✍️ 2. Meet the Staff: Your Musical Grid
The staff is a set of five horizontal lines where musical notes are written.
Each line and space represents a different pitch.
Notes placed higher on the staff sound higher in pitch, and those placed lower sound deeper.
🎶 3. Treble & Bass Clef – Two Musical Voices
You’ll usually see one of these two clefs at the beginning of the staff:
Treble Clef (𝄞): Used for higher notes. Instruments: piano (right hand), flute, violin, guitar, vocals.
Bass Clef (𝄢): Used for lower notes. Instruments: piano (left hand), bass guitar, cello, tuba.
Each clef helps define which note corresponds to which line or space.
🔡 4. Understanding the Note Names
On the Treble Clef, here’s how to remember the lines and spaces:
Lines (bottom to top): E – G – B – D – F → “Every Good Boy Deserves Fun”
Spaces: F – A – C – E → “FACE”
For Bass Clef:
Lines: G – B – D – F – A → “Good Boys Do Fine Always”
Spaces: A – C – E – G → “All Cows Eat Grass”
⏰ 5. Time Signatures – The Pulse of Music
You’ll see numbers at the start of a staff like 4/4, 3/4, or 6/8.
The top number tells you how many beats are in each measure (section).
The bottom number tells you what kind of note counts as one beat (usually a quarter note).
4/4 time is the most common – it’s called “common time”.
🧱 6. Measures & Bar Lines
Music is divided into chunks called measures. These are separated by vertical bar lines. They help you organize and read music more easily, beat by beat.
Add rests to this list – they show when to be silent for a specific time.
🔗 8. Ties, Slurs & Dots – Expression Tools
Tie: Connects two of the same note together.
Slur: Smoothly connects two different notes.
Dot: Adds half the original value to a note (e.g., a dotted half note = 3 beats).
These add emotion and feel to your playing.
🎹 9. Practice With Simple Songs
Try starting with “Twinkle Twinkle Little Star” or “Mary Had a Little Lamb.” Use sheet music, point out each note, and play slowly with both hands if you’re learning piano. The more you practice, the faster it becomes natural.
💡 Tips to Learn Sheet Music Faster
Label notes on the staff. (Write A, B, C, etc. above each note at first.)
Use flashcards to memorize notes and rhythms.
Clap out rhythms before you play them.
Start slow and increase speed gradually.
Use apps or games that teach sight-reading.
🧠 Why Learning to Read Music Is Important
You can play any song just by looking at the sheet.
It opens the door to classical, jazz, and choral music.
It improves memory, coordination, and listening skills.
You can join bands, orchestras, or perform confidently.
🎓 About The Mystic Keys
At The Mystic Keys, we specialize in one-on-one online music education through Zoom. Whether you’re learning piano, keyboard, guitar, vocals, or music theory, we offer:
🎼 Flexible scheduling
📚 Personalized notes and session recordings
🏅 Trinity College London certification support
👩🏫 Grade 8 and highly trained teachers
✨ Performance videos and revision support
💬 Student-teacher-director group for all session material
We’re here to guide you from your first note to your dream performance.
For more information and exciting resources about learning music, visit our website at The Mystic Keys. For more music content and exciting offers follow us on
When a child begins their musical journey, it is not just an individual pursuit—it becomes a family experience. Behind every young pianist, guitarist, vocalist, or violinist is a parent who encouraged their first note, waited outside during countless music lessons for children, or clapped louder than anyone at their first recital.
A well-trained ear is one of the most valuable tools any musician can have. Whether you’re a singer, instrumentalist, producer, or composer, your ability to recognize pitch, rhythm, harmony, and melody will significantly enhance your creativity and confidence.
True Signs You’re Addicted to Music? They’re everywhere. Music isn’t just something you listen to—it’s something you live. If you’ve ever caught yourself air-drumming in public or turning a simple walk into a full-blown concert in your head, you’re not alone.
Not every student learns the same way, especially when it comes to music. Some thrive with visual aids, while others prefer learning by ear. That’s why personalized music training is essential not just a bonus. It allows each student to excel by learning in a way that suits their unique style and pace.
🎼 1. Tailored Lessons = Faster Progress
In personalized training, every class is crafted around your strengths, weaknesses, and goals. Whether you want to ace a Trinity Grade exam or play worship music at church, your lesson plan reflects your musical vision.
Benefits include:
Skipping what you already know
Focusing more time on what you struggle with
Setting realistic, motivating goals
🧠 2. Better Focus, Better Results
Unlike group classes where teachers divide attention, personalized lessons mean you get 100% of the teacher’s focus. This leads to:
Immediate corrections
Deeper understanding of concepts
Stronger teacher-student rapport
This kind of attention dramatically boosts learning efficiency.
🎤 3. Confidence Building Is Built In
A major advantage of customized training is how it empowers you. When you see consistent improvement (because the lessons are designed for your pace), your confidence grows.
Whether you’re performing in a recital, recording a song, or sitting for an exam—you’ll do it with clarity and self-assurance.
📚 4. Flexible Pacing That Fits Your Life
Everyone has different availability, energy levels, and learning speeds. Personalized training respects that. Whether you’re a school student or a working adult, your music journey adjusts to your schedule, not the other way around.
🎧 5. Clear, Trackable Growth
With custom lesson plans, weekly session notes, and regular feedback, you can clearly track how far you’ve come. This motivates you to keep going—and you’ll be amazed at your transformation when you compare your old recordings with recent ones.
🔁 6. Adapts as You Grow
The best thing about one-on-one music coaching is its adaptability. Your teacher evolves the training plan as your skillset expands—whether you want to shift from beginner piano to advanced improvisation or from Bollywood vocals to Western vocals.
💻 7. Tech-Enhanced, Not Tech-Dependent
With The Mystic Keys, personalized training is paired with digital tools like:
Based live sessions
High-quality audio-video recordings
Shared practice notes and song sheets
Dedicated WhatsApp group for support
This ensures you have everything you need—even after class ends.
🎓 8. Prepares You for Exams, Performances & Beyond
Want to clear your Trinity Grade exams? Perform at school or church? Upload your own music videos online?
Personalized training equips you for it all. You’re not just learning how to play or sing—you’re developing musical fluency that stands the test of time.
🎹 About Us – The Mystic Keys
At The Mystic Keys, we offer personalized music training that goes beyond just playing notes. Our one-on-one lessons are tailored to each student’s pace, goals, and learning style—whether you’re learning vocals or instruments. With expert teachers, including Grade 8 certified professionals, every session is designed to inspire, guide, and transform your musical journey.
🎶 Here’s what sets us apart:
Flexible scheduling
Personalized notes & recordings
International certifications (Trinity College London)
Serious, passionate music mentors
Dedicated WhatsApp support group with student, teacher & admin
Whether you’re a complete beginner or an aspiring artist, The Mystic Keys is where your musical journey takes flight.
For more information and exciting resources about learning music, visit our website at The Mystic Keys. For more music content and exciting offers follow us on
When a child begins their musical journey, it is not just an individual pursuit—it becomes a family experience. Behind every young pianist, guitarist, vocalist, or violinist is a parent who encouraged their first note, waited outside during countless music lessons for children, or clapped louder than anyone at their first recital.
A well-trained ear is one of the most valuable tools any musician can have. Whether you’re a singer, instrumentalist, producer, or composer, your ability to recognize pitch, rhythm, harmony, and melody will significantly enhance your creativity and confidence.
True Signs You’re Addicted to Music? They’re everywhere. Music isn’t just something you listen to—it’s something you live. If you’ve ever caught yourself air-drumming in public or turning a simple walk into a full-blown concert in your head, you’re not alone.
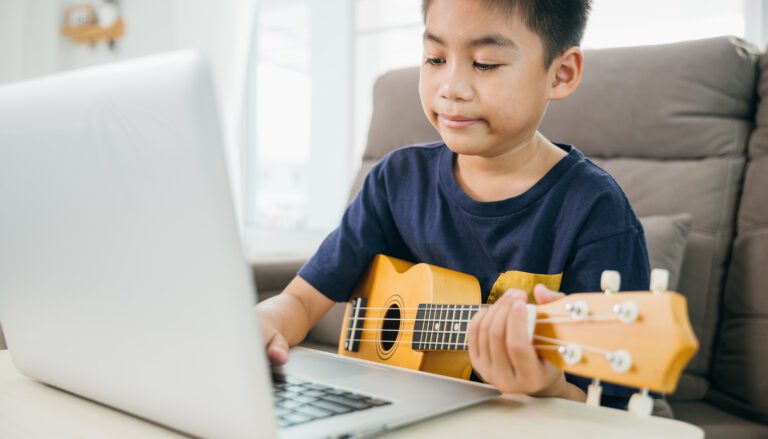
Left vs. Right-Hand Ukulele Playing | What to Know
The ukulele brings joy and accessibility to players of all ages and skill levels around the world. As a beginner ready to strum your first chord or an experienced musician aiming to grow your skills, you’ll face an important decision early on: will you play left-handed or right-handed? Your choice in this Left vs. Right-Hand Ukulele debate directly shapes your comfort, technique, and overall learning experience. In this blog, we’ll guide you through everything you need to know about both playing styles, helping you make a clear, confident decision that suits your natural tendencies and musical goals.
Understanding Handedness in Ukulele Playing
Before diving into the nuances of ukulele playing styles, let’s first understand what “handedness” means in the context of Left vs. Right-Hand Ukulele playing. Most stringed instruments, including the ukulele, follow a traditional right-handed design. In this setup, players use their left hand on the fretboard to press down strings and form chords or notes, while the right hand strums or plucks the strings to create sound.
Right-handed players usually find this arrangement intuitive because their dominant right hand takes charge of the rhythm and dynamics of strumming, while the left hand focuses on finger placement and chord transitions.
So what happens when a player is left-handed? Should they flip the setup and opt for a left-handed ukulele? Or can they adapt to the standard right-handed format? These questions lie at the heart of the Left vs. Right-Hand Ukulele debate and raise important considerations around comfort, adaptability, and learning preferences.
What Does Left-Handed Ukulele Playing Mean?
A left-handed ukulele mirrors the traditional right-handed model. Manufacturers arrange the strings so that when players hold the instrument in their left hand, they fret with their dominant hand and strum with the right. This setup allows left-handed individuals to use their stronger hand for fretting, which many find more natural and comfortable than strumming.
There are generally two ways left-handed players approach the ukulele:
1. Play a Left-Handed Ukulele:Some left-handed players choose to buy or restring a ukulele specifically made for left-handed playing. The instrument is flipped so that the thickest string is at the bottom when held left-handed, mirroring the right-handed version.
2. Adapt to a Right-Handed Ukulele:Other left-handed players opt to learn on a standard right-handed ukulele. Despite the initial awkwardness, many find this method manageable and even advantageous over time.
Advantages of Playing Right-Handed — Even if You’re Left-Handed
Interestingly, a significant number of left-handed players choose to learn ukulele right-handed. Here’s why:
Availability and Cost: Right-handed ukuleles dominate the market. Left-handed models are less common and sometimes more expensive or harder to find. Starting on a right-handed ukulele opens up more choices and can be more budget-friendly.
Instruction and Resources:Most tutorials, lessons, chord charts, and videos assume right-handed playing. By learning right-handed, lefties can follow along more easily without needing mirrored instructions.
Ambidexterity Development:Learning to use your non-dominant hand for fretwork can improve overall hand coordination and flexibility. This can be a beneficial skill in the long run.
Ease of Switching Instruments:If you decide to play other stringed instruments later, like guitar or bass, the standard right-handed orientation remains the norm. Learning right-handed ukulele can prepare you for this transition.
Social and Performance Situations:Playing right-handed can help you blend in easily with other players and band setups that expect right-handed orientation.
Advantages of Playing Left-Handed
That said, there are clear advantages to playing a ukulele left-handed for those who find it more natural:
Comfort and Ergonomics: Holding the instrument in the dominant hand can feel more natural and comfortable, especially during long practice sessions or performances.
Faster Learning Curve: For some left-handed beginners, starting with their dominant hand on the fretboard allows them to form chords and finger movements more quickly.
Personal Preference: Music is personal. If you instinctively feel left-handed playing fits your style, it may enhance your confidence and enjoyment.
Unique Style:Left-handed players sometimes develop a distinctive playing style that can set them apart musically.
Considerations When Choosing Between Left-Handed and Right-Handed Ukulele
While preferences vary, here are some practical considerations to help you decide which route to take:
1. Your Natural Dominance and Coordination
Which hand do you write with? Do you feel more dexterous or coordinated with one hand?
Do you play other instruments or sports that require hand coordination? How does your handedness translate in those activities?
2. Accessibility and Cost
Check availability of left-handed ukuleles locally or online.
Consider cost differences between standard and left-handed models.
3. Learning Resources
Evaluate whether you want to learn from videos, tutorials, or teachers who primarily teach right-handed ukulele.
If you go left-handed, be prepared to adapt or find resources tailored to your style.
4. Instrument Setup and Maintenance
Restringing or flipping a ukulele to accommodate left-handed playing requires care to avoid damage.
Some instruments are designed specifically for one handedness, with bracing and construction favoring that orientation.
5. Long-Term Goals
Think about whether you might want to switch to other instruments.
Consider your interest in joining ensembles or bands where handedness might matter.
How to Play Left-Handed Ukulele
If you decide to go left-handed, here’s what you need to know:
Purchase a Left-Handed Ukulele:This is the easiest way, as the instrument is designed for left-handers.
Restring a Right-Handed Ukulele: If you have a right-handed ukulele, you can restring it by reversing the order of the strings to mirror a left-handed setup. However, this can affect the instrument’s setup and may require professional adjustment.
Left-Handed Playing Technique: The left hand will fret the notes on the neck while the right hand strums. You’ll need to practice chord shapes and strumming patterns accordingly.
How to Adapt as a Left-Handed Player on a Right-Handed Ukulele
When navigating the Left vs. Right-Hand Ukulele dilemma, many left-handed players choose to play right-handed for better accessibility and learning resources. If you decide to go this route, follow these tips to ease your transition. Practice finger independence by starting with simple chord shapes—this helps your non-dominant left hand get used to fretting accurately. Strum confidently with your dominant right hand, using its natural rhythm and strength to bring expression to your playing. Stay patient—while it might feel awkward at first, regular practice will build dexterity over time. Watch yourself in a mirror or record videos to observe and refine your technique. And finally, take lessons if possible—a skilled teacher can tailor their instruction to your handedness and help you progress more efficiently.
Famous Left-Handed Ukulele Players
Right-handed players may dominate the ukulele world, but many left-handed musicians have carved out their own place in music history. They prove that handedness influences style, but doesn’t define it.
Jake Shimabukuroplays primarily right-handed, but he actively experiments with left-handed techniques to showcase his versatility.
Legendary guitarists like Jimi Hendrix embraced left-handed playing and revolutionized stringed instrument techniques. Their bold approach continues to inspire ukulele players to explore handedness as a creative choice rather than a limitation.
Conclusion | There Is No “Wrong” Way to Play the Ukulele
You make your choice in the Left vs. Right-Hand Ukulele debate based on what feels most comfortable, natural, and aligned with your musical goals. Each style offers its own advantages and challenges, but neither one proves universally better.
If you’re a left-handed beginner, try out both methods. Borrow ukuleles, follow a few tutorials, and test which playing style suits you best. Since the ukulele celebrates creativity and self-expression, pick the approach that lets you play with ease and confidence.
At The Mystic Keys, we support your journey with personalized Ukulele Lessons Online for both left- and right-handed players. Our experienced instructors guide you step by step, helping you develop solid technique, no matter which hand you lead with.
As you progress through the Left vs. Right-Hand Ukulele journey, stick to consistent practice, trust your growth, and play with heart. When you stay passionate and focused, you unlock the true joy of mastering the ukulele.
For more information and exciting resources about learning music, visit our website at The Mystic Keys. For more music content and exciting offers follow us on
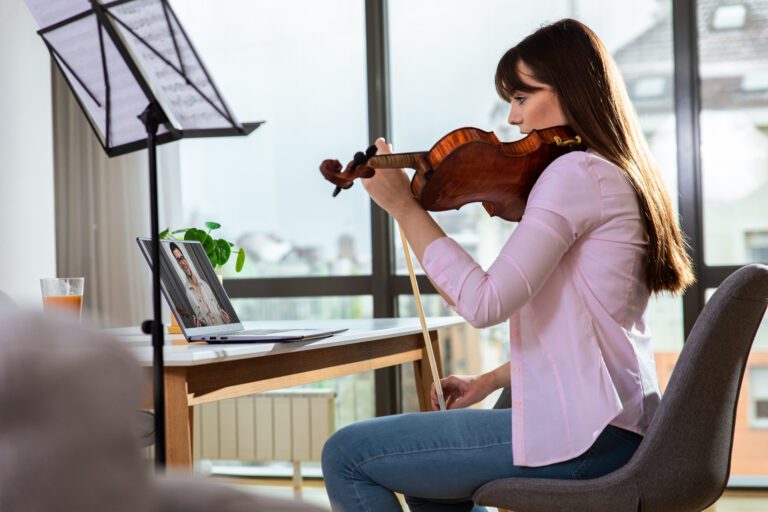
5 Tips to Make the Most of Your Virtual Music Classes
Virtual music classes have opened up endless possibilities—learn from top teachers, access flexible schedules, and train from the comfort of your home. But to truly excel in virtual music classes, you need the right approach.
Here are 5 simple yet powerful tips to make your online music lessons more productive, enjoyable, and effective.
1. 🎧 Create a Distraction-Free Setup
Before your class starts:
Choose a quiet, well-lit spot
Keep your device fully charged
Place your camera so the teacher can clearly see your hands or posture
Use headphones for better sound clarity
A clean and organized setup helps you stay focused and lets your teacher guide you more effectively.
2. 📒 Be Prepared Before Class Starts
Make sure you:
Keep your instrument tuned and ready
Open your notes, music sheets, or app beforehand
Review the homework or recordings from the previous session
This preparation shows dedication and helps you make the most of every minute with your teacher.
3. 📝 Take Notes and Record the Session
Online lessons can move fast. Taking quick notes or saving key points will help you revise better later.
At The Mystic Keys, we provide recorded sessions after every class. Make use of them! Rewatching helps you catch missed details and improve your technique.
4. 🎯 Practice Smart Between Sessions
Success doesn’t happen in class—it happens between classes.
Use your teacher’s feedback to:
Set daily practice goals
Focus more on your weak areas
Practice shorter segments with full concentration
Even 15–30 minutes of focused daily practice is more valuable than irregular long sessions.
5. 💬 Communicate Openly With Your Teacher
One-on-one virtual music lessons work best when there’s clear communication.
If you:
Don’t understand something
Want to try a new song
Need to reschedule 👉 Speak up!
At The Mystic Keys, we encourage open and supportive communication in your private WhatsApp group, where you, your teacher, and our team stay connected at all times.
🎹 Final Thoughts
Virtual music classes are here to stay—and they can be just as impactful as in-person lessons, if not more. By following these five tips, you’ll build confidence, grow faster, and enjoy every step of your musical journey.
🌟 Learn with The Mystic Keys
We offer:
One-on-one music lessons
Personalized recordings, notes & schedules
Flexible rescheduling options
Expert Grade 8 & Trinity-certified teachers
Support via dedicated WhatsApp group
🎵 Whether you’re a beginner or preparing for international certification, The Mystic Keys is your trusted guide to musical excellence.
🎼 5 Quick Tips for Better Online Music Lessons
Setup – Quiet space, good camera & clear audio.
Be Ready – Review notes, tune your instrument.
Record – Save sessions & take helpful notes.
Practice – Focused daily practice matters.
Talk – Communicate clearly with your teacher.
For more information and exciting resources about learning music, visit our website at The Mystic Keys. For more music content and exciting offers follow us on
When a child begins their musical journey, it is not just an individual pursuit—it becomes a family experience. Behind every young pianist, guitarist, vocalist, or violinist is a parent who encouraged their first note, waited outside during countless music lessons for children, or clapped louder than anyone at their first recital.
A well-trained ear is one of the most valuable tools any musician can have. Whether you’re a singer, instrumentalist, producer, or composer, your ability to recognize pitch, rhythm, harmony, and melody will significantly enhance your creativity and confidence.
True Signs You’re Addicted to Music? They’re everywhere. Music isn’t just something you listen to—it’s something you live. If you’ve ever caught yourself air-drumming in public or turning a simple walk into a full-blown concert in your head, you’re not alone.
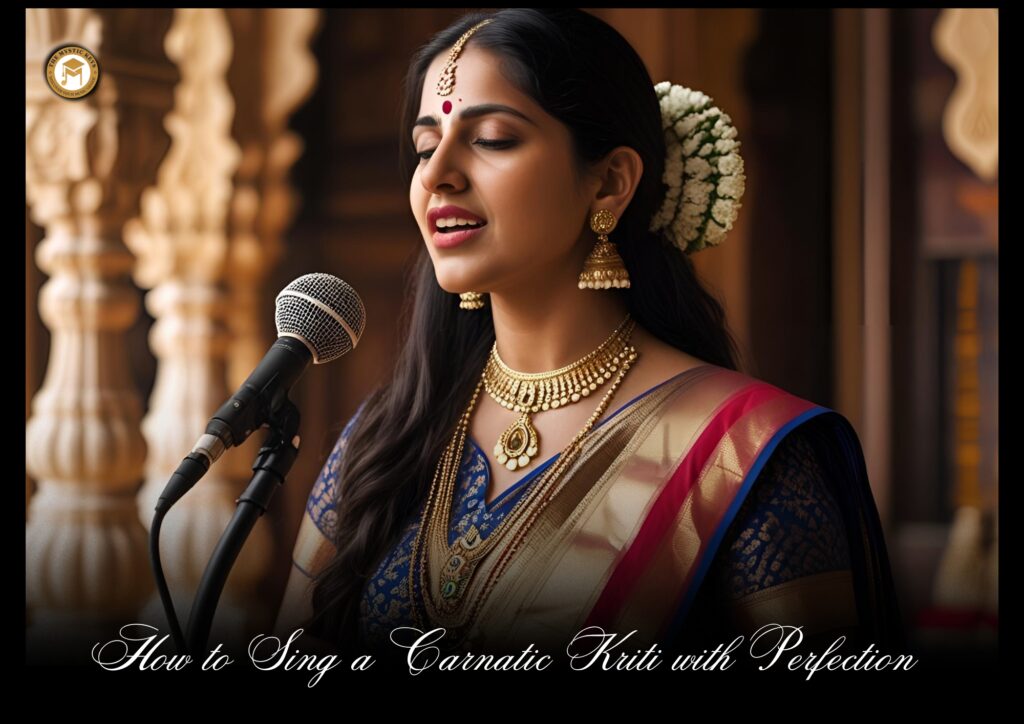
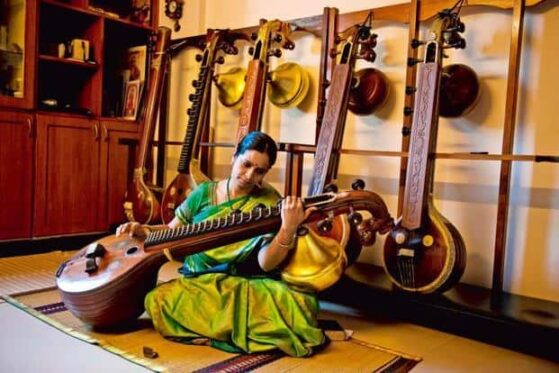
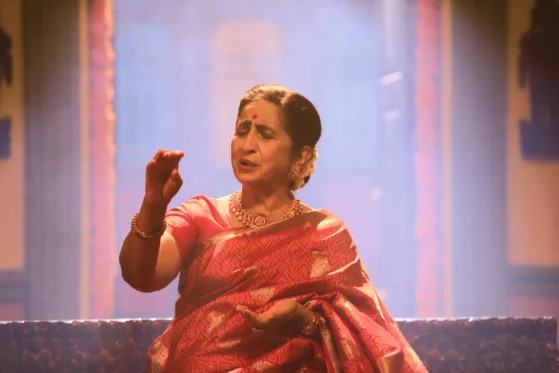
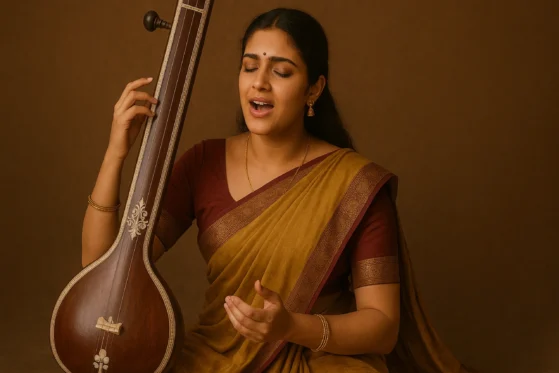
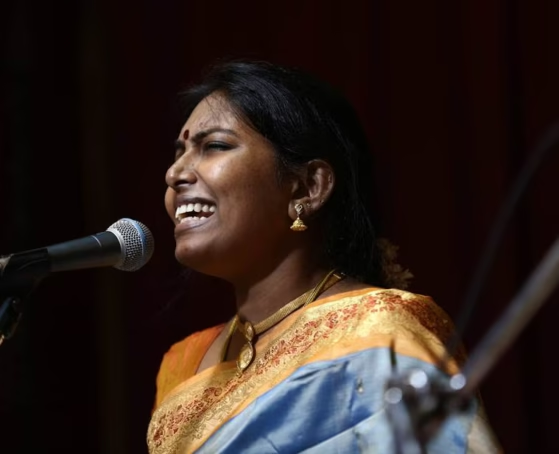
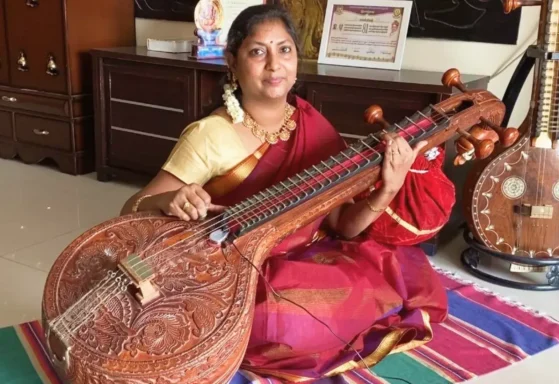
How to Sing a Carnatic Kriti with Perfection | A Step-by-Step Guide
Carnatic music is a profound art form steeped in centuries of tradition, emotional richness, and technical complexity. Among its many treasures, the Kriti stands out as the most widely performed and revered composition type. To sing a Carnatic Kriti beautifully and with precision is a journey that goes beyond mere vocalization. It involves immersing yourself in the intricate nuances of melody and rhythm, connecting deeply with the composer’s intent, and expressing the heartfelt emotion woven into every line. Whether you’re a beginner striving to grasp the foundational elements or an intermediate student aiming to refine your skills, mastering the art of singing a Carnatic Kriti calls for dedication, sensitivity, and thoughtful practice.
But what exactly does it take to achieve this mastery? In the following sections, we will carefully explore the essential steps—moving from careful preparation through to confident performance—that will help you sing a Carnatic Kriti with clarity, authenticity, and emotional depth.
Understanding What a Kriti Is | The Foundation
Before we explore how to sing a Carnatic Kriti with perfection, it’s important to first understand what a Kriti truly is. At its core, a Kriti is a structured and devotional musical composition that forms the heart of Carnatic music performances. To sing a Carnatic Kriti with authenticity, one must first appreciate its internal architecture, which typically consists of three key sections:
Pallavi – the main thematic line or refrain that sets the tone
Anupallavi – a continuation of the theme, often offering contrast or further development
Charanam – the concluding section, usually more elaborate and musically rich
These segments are not just compositional formats but vehicles of expression, emotion, and spirituality. Unlike varnams or keerthanams, kritis delve deeper into devotional content and often unfold layers of philosophical and emotional meaning through the interplay of melody and lyrics. When you sing a Carnatic Kriti, you’re not merely reciting notes—you’re invoking ragabhava, the emotional essence of the raga, and bringing to life the vision of legendary composers like Tyagaraja, Muthuswami Dikshitar, and Syama Sastri, whose works transcend time as spiritual and musical masterpieces.
Choose the Right Kriti for Your Voice and Level
A common mistake among learners eager to sing a Carnatic Kriti is to jump into compositions that are either too complex or not suited to their current vocal range. This often leads to frustration and discouragement early in the learning process. To avoid this, it’s essential to choose a kriti thoughtfully and strategically. Begin by selecting one that is set in a raga you are already familiar with. This familiarity helps you focus more on perfecting the phrases, gamakas, and expressions rather than struggling to grasp a new melodic framework.
Equally important is selecting a kriti that matches your vocal ability and comfort level. Avoid extremely fast or intricate compositions in the beginning. Instead, opt for kritis with clear lyrical content and a slow to moderate tempo, which allows for thorough learning and detailed articulation. For beginners, compositions like “Vatapi Ganapatim”(Hamsadhwani) and “Rama nannu brovara” (Harikambhoji) serve as excellent choices. These kritis strike a good balance between accessibility and musical depth—ideal stepping stones as you learn to sing a Carnatic Kriti with confidence and expression.
Listen, Observe, and Internalize
Once you’ve chosen your kriti, don’t jump into singing immediately. The first step is to listen to the composition multiple times—preferably from authentic sources or your own guru.
Pay close attention to:
The flow of the ragaand how it is brought out in each line
Gamaka (ornamentation) used in sangatis (musical variations)
Pronunciationand split of sahitya (lyrics)according to tala
Bhava (expression) with which the composition is rendered
Listening trains your subconscious. The more you internalize, the easier it will be to reproduce the essence of the kriti.
Break Down the Sahitya and Understand Its Meaning
Each Kriti is not just music; it’s poetry drenched in devotion. Understanding the meaning of the lyrics enhances your emotional connection and adds soul to your singing.
For example, in Tyagaraja’s “Endaro Mahanubhavulu,” he praises the many saints and great souls who have experienced divinity. Understanding this helps you deliver the kriti with appropriate humility and reverence.
So, before learning the tune:
Translate each line (with your teacher or via trusted sources)
Identify where the composer emphasizes devotion, surrender, joy, or pleading
Match the raga bhava to the sahitya bhava
Master the Raga and Tala Framework
Now comes the technical preparation. Every kriti is embedded within a raga (melodic framework) and tala (rhythmic cycle). To sing it perfectly, your grasp of the raga must be solid.
For the raga:
Practice the arohana-avarohana(ascending and descending scales)
Singsimple phrases (sancharas)within the raga
Learn and practice the specific gamakas that define the raga’s identity
For the tala:
Clap and recite the tala before singing
Use a metronome or tala app to maintain a steady tempo
Break the kriti intotala unitsfor clarity
This step ensures you don’t just memorize the kriti but sing it in perfect alignment with its melodic and rhythmic soul.
Learn the Sangatis Systematically
Sangatis are the variationsor musical elaborations of a line in a kriti. They offer depth and allow the singer to explore the raga further. But they must be learned in progressive layers:
Begin with the basic line (plain tune)
Then, move tosimpler sangatis
Gradually build up tomore complex versions
Repeat each sangati multiple times until it flows effortlessly. If you learn from a guru, follow their version faithfully, as Carnatic music encourages bani (style lineage) preservation.
Focus on Bhava – Sing with Feeling
Once you’ve learned the technical aspects, it’s time to bring life into the kriti. Bhava or emotion is what separates a technically correct rendition from a truly moving one.
To develop bhava:
Practice singing with closed eyesto focus inward
Try singing the kriti without any shrutiand see if the raga still resonates
Express themeaningof the lyrics through your voice modulation, dynamics, and pauses
As your familiarity grows, you’ll find the kriti naturally flows with emotion.
Record, Review, and Refine
Perfection comes with reflection. Record your practice sessions and performances, and watch them with a critical ear.
When reviewing:
Check if you’re maintaining shruti consistently
Identify tala misalignments or speed fluctuations
Evaluate if your sangatis are clear and well-executed
Ask yourself: “Does my rendition reflect the mood and spirit of the kriti?”
Share recordings with your teacher or fellow learners for constructive feedback.
Perform with Confidence and Grace
Finally, take the Kriti to the stage—or even a small gathering. Performance is a different experience from practice. It teaches you to stay calm, connect with your audience, and deliver with authenticity.
Before performing:
Practice with sruti box and mridangam support
Rehearse the entire kriti without breaks
Visualize the audience and your delivery
And remember: perfection is not just about technical accuracy—it’s about devotion, clarity, and expression.If you can touch even one heart with your singing, your Kriti is already perfect.
Final Thoughts | Singing a Kriti is a Lifelong Journey
A Kriti may only last a few minutes on stage, but the journey to truly sing a Carnatic Kriti with depth and grace is often a long and evolving one. What begins as a simple melody gradually transforms into a rich tapestry of emotion, nuance, and precision. It can take weeks, months—or even years—to internalize every sangati, perfect each gamaka, and align the expression with the soul of the composition.
And yet, that’s precisely the enduring beauty of Carnatic music. Each time you return to the same Kriti, it reveals something new—a subtle inflection you previously overlooked, a deeper emotional shade to interpret, or a more refined way to articulate a musical phrase.
This continuous unfolding is not a limitation but a gift. It teaches us that to sing a Carnatic Kriti is not just a performance—it’s a spiritual and artistic practice. So stay patient as you refine, stay persistent as you grow, and above all, stay passionate. Because with every sincere attempt, you’re not just learning music—you’re becoming one with it.
Want to Perfect Your Kriti Singing?
Join our Carnatic Vocal Lessons Online at The Mystic Keys, where seasoned instructors will take you on a transformative journey—from foundational skills to advanced techniques. Discover the subtle art of Kriti singing, master bhava-rich expression, and build a disciplined practice routine—all from the comfort and convenience of your home.
For more information and exciting resources about learning music, visit our website at The Mystic Keys. For more music content and exciting offers follow us on
Carnatic music, alongside Hindustani classical music, is one of India’s two primary classical traditions. Rooted in South India, it is deeply intertwined with devotional and spiritual practices, with compositions dedicated to Hindu deities
How Technology is Enhancing Virtual Music Classes in 2025
Gone are the days when music lessons meant traveling to a physical studio every week. In today’s digital world, technology is enhancing virtual music classes, making them more accessible, personalized, and effective than ever before.
Whether you’re a beginner or an advanced student, here’s how tech is making virtual music classes better than in-person ones in many ways.
1. 🎥 High-Quality Video Conferencing
Platforms like Zoom have improved tremendously:
HD video and clear audio
Screen sharing for notes, backing tracks, and digital pianos
Adjustable audio settings to eliminate background noise
Teachers and students can now communicate and demonstrate with the same clarity as they would face-to-face.
Students see exactly what to play and how to play it in real time, making it easier to follow instructions and correct mistakes instantly.
3. 📹 Session Recordings for Better Practice
One of the biggest advantages of online learning? Your classes are recorded and sent to you.
This allows students to:
Revisit complex sections
Review teacher feedback
Practice along at their own pace
At The Mystic Keys, we share personalized recordings after every session for focused revision.
4. 📲 Personalized Support & Communication
Thanks to messaging platforms like WhatsApp, students now:
Get reminders before sessions
Receive notes, PDFs, and links instantly
Stay in touch with the teacher and admin team
At The Mystic Keys, we use a private group that includes the student, teacher, and coordinator—keeping everything organized and easy to access.
5. 🧠 AI & Smart Practice Tools
Smart apps like Yousician, TonalEnergy, and GuitarTuna are becoming popular for:
Real-time pitch correction
Rhythm accuracy checks
Chord recognition
These tools give instant feedback between lessons, helping students build confidence and stay on track.
6. 🎹 Digital Instruments & Virtual Software
No instrument? No problem.
Technology allows learners to:
Use virtual pianos and DAWs (Digital Audio Workstations)
Compose music digitally
Connect MIDI keyboards and apps to simulate real instruments
It’s never been easier to start learning music without heavy investment.
7. 🌐 Global Access to Top Teachers
You’re no longer limited by geography. With tech-enabled learning:
Students in India can learn from teachers in the UK, US, or anywhere
Teachers are selected based on expertise, not just location
Lessons are scheduled across time zones with flexibility
🎯 Final Thoughts
Technology is not just a “support” for music education—it’s now at the core of how we teach and learn. If you’re not already embracing virtual music classes, you might be missing out on a smarter way to grow.
🎵 Learn with The Mystic Keys
At The Mystic Keys, we offer:
One-on-one virtual sessions
Recorded sessions, notes, and personalized practice plans
Flexible rescheduling
International certifications (Trinity College London)
Professional teachers & tech-powered learning
🎶 Start your musical journey today.
For more information and exciting resources about learning music, visit our website at The Mystic Keys. For more music content and exciting offers follow us on
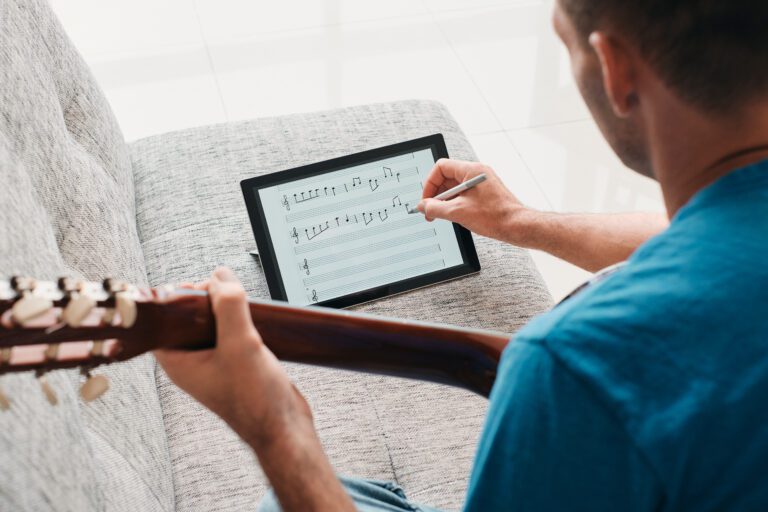
This Music Theory Guide is perfect for beginners who want to understand how music works—from notes and scales to chords and rhythm. It lays a strong foundation that helps musicians of all levels gain clarity and confidence in their playing, composing, or singing.
A well-trained ear is one of the most valuable tools any musician can have. Whether you’re a singer, instrumentalist, producer, or composer, your ability to recognize pitch, rhythm, harmony, and melody will significantly enhance your creativity and confidence.
The voice is an incredible gift. It’s how we sing, teach, inspire, and connect. But like any instrument, it needs proper care to remain strong, clear, and resilient. Vocal strain is a common challenge faced not only by singers, but also by teachers, speakers, coaches, content creators—anyone who relies on their voice daily.