
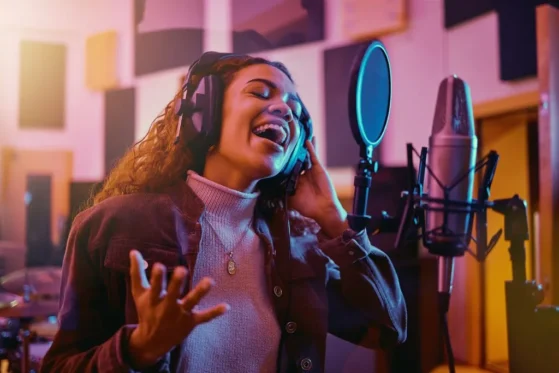
Microphone Techniques for Live and Studio Performances
Microphones are arguably the most crucial piece of equipment in the world of audio—whether you are a musician performing live on stage or a producer working behind the scenes in a studio. They act as the bridge between the sound source and the audience or recording device, translating performance into audible experience. However, the true power of a microphone lies not just in the hardware itself, but in how it’s used. Microphone techniques—from understanding mic types and polar patterns to mastering placement and handling—play a vital role in shaping the clarity, tone, and impact of your sound.
In this comprehensive guide, we’ll take a deep dive into everything you need to know about microphone techniques. You’ll learn how to choose the right microphone, apply optimal placement strategies, and adapt your approach to suit both live performances and studio sessions. Along the way, we’ll tackle common challenges and share actionable tips so you can consistently capture clean, professional audio—every single time.
The Importance of Microphone Techniques | More Than Just Point and Speak
At first glance, using a microphone might seem as simple as “pointing and capturing.” It appears straightforward—just place the mic in front of a singer or instrument and press record. However, the moment you encounter issues like feedback, muddiness, or muffled vocals, it quickly becomes clear that there’s much more going on beneath the surface. That’s where effective microphone techniques come into play. They aren’t just technical details; they’re essential tools for achieving clarity, balance, and depth in your sound. Whether you’re performing live or recording in a studio, understanding and applying the right microphone techniques can mean the difference between a flat, amateurish output and a rich, professional sound. In both settings, mastering these techniques transforms the mic from a simple device into a powerful instrument of expression.
The truth is, microphone techniques are an art and science that deeply affect:
Sound clarity and tonal balance: The position and angle of the mic can emphasize or diminish certain frequencies.
Background noise control: Proper technique helps isolate your source from unwanted ambient sounds.
Avoiding feedback and distortion: Especially in live settings, mic handling and placement play a critical role in clean sound.
Capturing the emotional and dynamic nuances of a performance, preserving the unique character of the instrument or voice.
Mastering microphone techniques allows you to turn a simple sound source into a rich and professional audio experience, whether your audience is in a concert hall or listening through headphones.
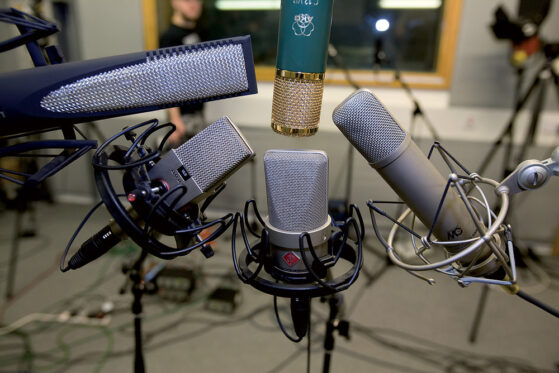
Getting to Know Your Microphones | The Foundation of Good Technique
Before diving into specific techniques, it’s essential to understand the tools you’re working with. Different microphone types and their characteristics dictate how you should use them for best results.
Dynamic Microphones |The Workhorses of Live Sound
Dynamic mics are rugged, durable, and designed to handle loud sound sources without distortion. They generally have a cardioid polar pattern, meaning they pick up sound primarily from the front and reject noise from the sides and back. This makes them ideal for live vocals, guitar amps, and drums.
Example: The Shure SM58 is a legendary live vocal mic thanks to its reliability and sound quality.
Condenser Microphones | The Studio Specialists
Condenser microphones are more sensitive and have a wider frequency response than dynamic mics. They excel at capturing subtle details, making them the preferred choice for studio vocals, acoustic instruments, and overhead drum miking. However, they are more fragile and require phantom power to operate.
Example: Neumann U87, widely used for vocals and studio work.
Ribbon Microphones | The Vintage Sound
Ribbon mics offer a warm, natural sound with smooth high frequencies and a bidirectional (figure-8) pattern. They are delicate and usually reserved for controlled studio environments, often favored for brass, guitar amps, and some vocal styles.
Polar Patterns Explained | Directionality Shapes Your Sound
The polar pattern of a microphone essentially defines how sensitive it is to sound coming from different directions. Grasping these patterns is fundamental because it directly influences where and how you place your microphone to achieve the best sound capture.
To begin with, the cardioid pattern is the most commonly used. It primarily picks up sound from the front while rejecting sounds coming from the rear. This makes it highly effective for isolating a specific sound source in environments where unwanted noise might be present.
Moving a step further, the supercardioid and hypercardioid patterns offer even greater directionality. They have a tighter pickup angle compared to cardioids, making them especially useful in loud or noisy settings where precision in capturing the sound source is critical.
On the other hand, omnidirectional microphones pick up sound equally from all directions. While this makes them less effective at isolating a single source, they excel at capturing the natural ambiance and reverberation of the room, which can add depth and realism to recordings.
Finally, the bidirectional or figure-8 pattern captures sound from both the front and back while rejecting the sides. This unique characteristic is particularly advantageous in specialized stereo recording techniques such as mid-side (MS) setups, where capturing the spatial relationship between sounds is key.
Each of these polar patterns carries its own set of strengths and trade-offs. Understanding these nuances allows you to choose the right microphone pattern tailored to your recording environment and specific audio goals, which ultimately makes a significant difference in the quality of your sound.
Transitioning into Live Sound | Techniques for the Stage
Live sound environments pose unique challenges: unpredictable acoustics, crowd noise, and the potential for feedback. Let’s explore proven microphone techniques to ensure your live performances sound clean and powerful.
Close Miking | Bringing the Performance Front and Center
Close miking involves positioning the microphone very close (1-6 inches) to the sound source. This method increases the direct sound and minimizes ambient noise and bleed from other instruments. In live settings, close miking enhances vocal presence and clarity, helping the performer cut through the mix.
To maintain sound quality, performers and engineers use pop filters or foam windscreens to reduce plosives and breath noise.
Proper Mic Handling | The Unsung Hero of Live Sound
Even the best microphone will fail if handled poorly. Steady hands, minimal movement, and holding the mic at the correct point (usually near the base, avoiding covering the grille) help avoid unwanted handling noise.
In addition, maintaining a consistent distance from the mic ensures a stable volume and tonal quality, especially important for vocalists.
Managing Feedback | The Live Sound Nemesis
Feedback, the unpleasant high-pitched squeal, happens when the mic picks up sound from stage monitors or PA speakers and re-amplifies it in a loop.
You can minimize feedback by:
Using directional microphones like supercardioids.
Positioning speakers in front of the mic to prevent direct sound pickup.
Employing equalizers to notch out problem frequencies.
Encouraging performers to keep their mic close and avoid moving it towards speakers.
Multiple Microphone Setups | Avoiding Phase Issues
When multiple microphones are used on stage—such as for drums or choir—phase cancellation can cause thin or hollow sounds. A good rule of thumb is the “3:1 rule”: each mic should be placed at least three times the distance apart relative to their distance from the sound source.
Careful positioning ensures the microphones complement rather than interfere with each other.
Instrument-Specific Mic Techniques on Stage
Vocals: Use cardioid dynamic mics, angle slightly to reduce breath noise.
Drums: Dynamic mics on snare and toms, condensers overhead for cymbals.
Guitar amps: Place the mic near but offset from the speaker cone for a balanced tone.
Bass amps: Use specialized low-frequency mics or combine direct input (DI) with a mic for fuller sound.
Capturing Ambiance | Adding Life to Live Recordings
Room or ambient mics placed at a distance capture crowd reactions and natural venue reverb, adding excitement and “space” to live recordings.

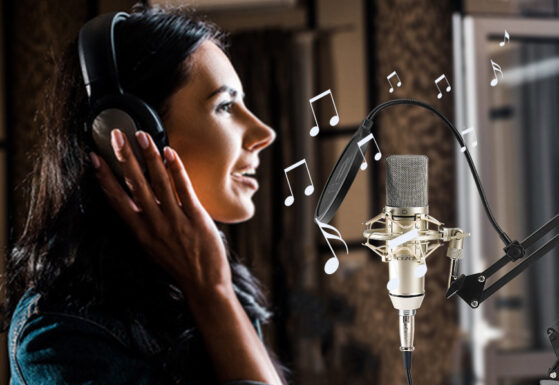
Transitioning into the Studio | Precision and Creativity
Unlike live sound, studio recording environments offer control and isolation, enabling more detailed microphone techniques that capture nuances and textures.
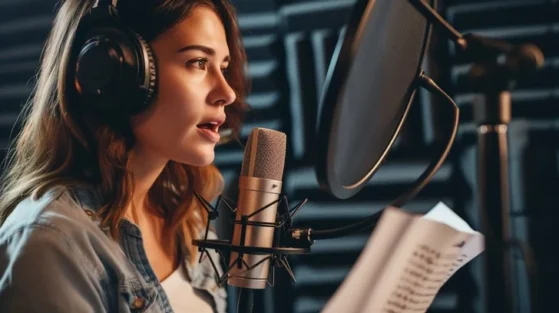
Close Miking in the Studio | Control with Detail
Close mic placement remains fundamental in studios but often paired with additional techniques for fuller sound. Use pop filters to tame plosives and shock mounts to isolate from vibrations.
Artists and engineers experiment with mic distance and angle to capture the desired tonal character—from bright and direct to warm and mellow.
Distance Miking and Room Sound | Adding Depth and Natural Reverb
Sometimes, the acoustic character of the recording space adds desirable warmth and ambiance. Placing microphones further away captures reflections and natural reverb.
Distance miking is especially effective for acoustic guitars, pianos, string ensembles, and choirs.
Stereo Microphone Techniques | Creating a Sense of Space
Stereo recording techniques add dimension and realism to recordings:
XY Technique: Two cardioid mics crossed at 90° capture a focused stereo image without phase problems.
AB Technique: Two spaced omnidirectional mics produce a wider stereo field with more room tone.
Mid-Side (MS) Technique: Combines a forward-facing cardioid mic with a figure-8 side mic, allowing flexible adjustment of stereo width in post-production.
ORTF Technique: Two cardioids spaced 17cm apart at 110°, blending time and intensity differences for natural stereo imaging.
Instrument and Vocal Techniques in the Studio
Vocals: Use large-diaphragm condenser mics for clarity and presence; experiment with distance and angles.
Acoustic Guitar: Combine a mic near the 12th fret (captures warmth) with one near the bridge (captures brightness).
Piano: Multiple mics positioned inside the soundboard or above strings capture the instrument’s complexity.
Drums: Use close mics on each drum, overheads for cymbals, and room mics to capture ambiance. Meticulous phase alignment between mics is critical here.
Isolation and Acoustic Treatment
Studio spaces benefit from acoustic panels, bass traps, and isolation booths to minimize unwanted reflections and external noise, ensuring cleaner recordings.

Common Challenges in Both Environments and How to Overcome Them
Handling Noise and Mechanical Vibrations
To ensure cleaner recordings, it’s important not just to rely on high-quality microphones, but also to take preventive steps against mechanical noise. One effective approach is to use shock mounts, which help isolate the mic from physical vibrations. Alongside this, training performers on proper mic handling techniques—such as avoiding sudden movements or contact with the cable—can significantly reduce unwanted noise from bumps or handling artifacts.
Feedback Control
In live settings, minimizing feedback loops requires a thoughtful combination of strategies. This includes placing speakers at optimal angles, using directional microphones to reduce pickup of unwanted sound, and fine-tuning EQ settings to suppress problematic frequencies before they become an issue.
Room Acoustics and Environmental Noise
“To achieve clean, high-quality recordings or sound reinforcement, it’s not just about the mic itself. Proper acoustic treatment in studios—such as using panels, diffusers, and bass traps—helps minimize reflections and colorations. Similarly, in live venues, thoughtful mic placement plays a crucial role in reducing ambient noise and ensuring clarity, even in challenging acoustic environments.
Phase Issues with Multiple Mics
By carefully adhering to the 3:1 rule—keeping each microphone at least three times farther apart than their distance from the sound source—and diligently checking the polarity switches on mixing consoles, you help ensure that multiple microphones work together harmoniously. This attention to detail prevents phase cancellation, which can otherwise cause certain frequencies to drop out or sound hollow, ultimately preserving the fullness and clarity of your audio.

Wrapping Up | The Art and Science of Microphone Techniques
Microphone techniques are not just about correct placement—they represent an evolving journey where science meets creativity. At The Mystic Keys, we guide students through this journey in our Western Vocal Lessons Online, helping them not only develop strong vocal skills but also understand how to use microphones as expressive tools. By combining technical knowledge with critical listening and hands-on experimentation, our learners begin to appreciate how microphone positioning, proximity, and control can dramatically influence vocal tone and presence.
Whether you’re capturing the raw intensity of a live worship session or the emotional detail of a studio ballad, mastering microphone techniques empowers you to communicate with clarity and impact. And like all aspects of musical growth, improvement comes through trial, reflection, and exploration. Record test takes, try different placements, and listen closely to what each setup offers. At The Mystic Keys, we encourage our students to break free from rigid rules and discover their unique sound—because sometimes, the most unforgettable performances arise when technique and creativity meet.
Related Blogs
Essential Vocal Warm-Up and Cool-Down Exercises for Singers
As a singer, whether you’re preparing for a performance, rehearsal, or even a recording session, taking care of your voice is essential. Vocal warm-up and cool-down exercises are an important part of maintaining vocal health and ensuring the best possible performance.
Can I learn western music
online?
The world of Western music is incredibly diverse, spanning from the grandeur of classical symphonies to the spontaneity of jazz improvisations and the catchy rhythms of contemporary pop.
When it comes to singing, smoothness and fluidity can elevate a performance to new heights. One of the key techniques used by vocalists to achieve seamless transitions between notes is the pitch glide.