
How to Tune a Ukulele Properly | With and Without a Tuner
Tuning your ukulele is one of the most essential skills every player needs to master. Whether you’re just beginning your ukulele journey or have been playing for a while, a well-tuned ukulele can significantly improve your playing experience. In this comprehensive guide, we’ll walk you through how to properly tune your ukulele, both with a tuner and by ear, offering tips, techniques, and best practices for each method.

Understanding Ukulele Tuning
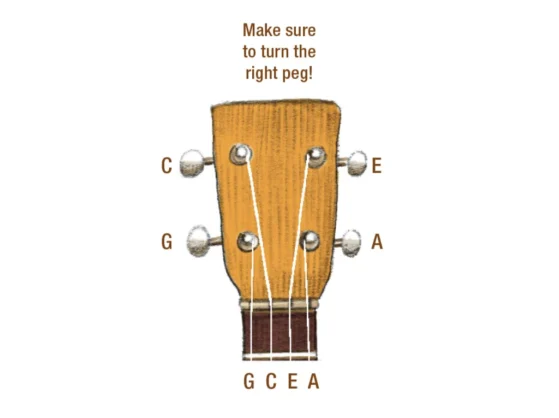
Before we dive into the actual process of tuning, it’s important to understand the basics of ukulele tuning. The ukulele typically has four strings, and each string is tuned to a specific pitch in standard tuning. The most common tuning for soprano, concert, and tenor ukuleles is G-C-E-A tuning. Here’s a breakdown of each string and its corresponding note:
G String (top string): Tuned to G.
C String (second string): Tuned to C.
E String (third string): Tuned to E.
A String (bottom string): Tuned to A.
Once you understand these basics, you’ll be ready to start tuning your ukulele.
Tuning a Ukulele With a Tuner
Using a tuner is the easiest and most accurate method for tuning your ukulele. It takes the guesswork out of the equation, providing you with a clear indication of whether your string is sharp, flat, or in tune. Below is a step-by-step guide to help you tune your ukulele with a tuner.
Step 1: Choosing the Right Tuner
There are several types of tuners available for tuning your ukulele. The most common types include:
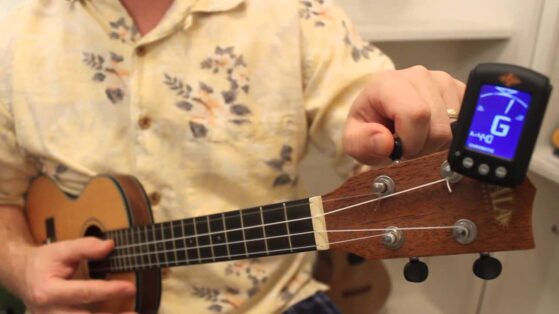
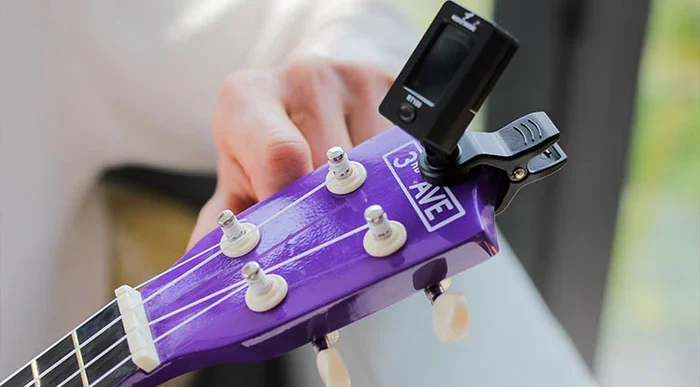
Clip-on Tuners: These tuners clip onto the headstock of your ukulele and pick up vibrations from the instrument. They are easy to use, portable, and ideal for beginners.
Smartphone Apps: You can download a ukulele tuner app on your phone. These apps function similarly to clip-on tuners, detecting the pitch through the microphone.
Pedal Tuners: For more advanced players, pedal tuners are useful, especially if you are using amplification, but they are less common for ukulele players.
For most beginners, a clip-on tuner is the best choice as it’s affordable, accurate, and easy to use.
Step 2: Power On Your Tuner
Once you have your tuner, turn it on and select the correct tuning mode. For most tuners, you can set it to “Ukulele” mode, which will show you whether each string is tuned to G-C-E-A. If using a chromatic tuner, you can tune the strings individually by adjusting the pegs until each string reaches its correct pitch.
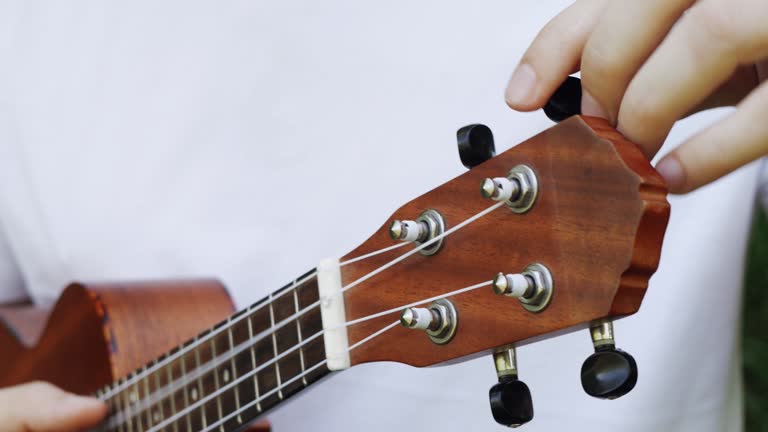
Step 3: Tune the G String
Start by tuning the G string, which is the top string. Pluck the string with your thumb or a pick. The tuner should read the note you are playing. If the needle or display indicates that the string is too low (flat), tighten the peg by turning it counterclockwise. If the note is too high (sharp), loosen the peg by turning it clockwise. Adjust until the tuner shows that the note is G.
Step 4: Tune the C String
Move to the C string (the second string from the top). Pluck the string and observe the tuner. If the string is too high or low, adjust the tuning peg accordingly. Keep tuning until the tuner reads C.
Step 5: Tune the E String
Next, tune the E string (third string). Follow the same procedure: pluck the string, adjust the tuning peg, and continue tuning until the tuner reads E.
Step 6: Tune the A String
Finally, tune the A string (bottom string). This string is typically the highest-pitched string on the ukulele. Once again, pluck it and adjust the tuning peg until the tuner shows A.
Step 7: Double-Check the Tuning
Once all strings are tuned, go back and recheck each one. Sometimes, tuning one string can affect the others slightly, so it’s important to ensure that all strings are correctly tuned before you begin playing.
Tuning a Ukulele Without a Tuner (By Ear)
While using a tuner is the easiest and most reliable method, learning how to tune by ear is an important skill for any musician. It helps develop your musical ear and a better understanding of pitch relationships. Here’s how you can tune your ukulele without a tuner, using a reference pitch.
Step 1: Find a Reference Note
To begin tuning your ukulele by ear, you need a reference note. A reference note is a sound from another instrument that you know is in tune. The most common reference note used is A. You can get this reference note from:
A piano (if you have access to one),
A tuning app (many apps can give you a pitch for A),
Another instrument that is already in tune (such as a guitar or another ukulele).
Step 2: Tune the A String
Start by tuning the A string (the bottom string). Pluck the string and compare its sound to the reference A note. If the string sounds too flat (lower than the reference), tighten the tuning peg by turning it counterclockwise. If the note is too sharp (higher than the reference), loosen the peg by turning it clockwise. Adjust until the pitch matches the reference.
Step 3: Tune the E String Using the A String
Once the A string is tuned correctly, you can use it to tune the E string. To do this, press down the A string at the 5th fret (this is the same pitch as the E string) and pluck it. Now compare the sound of the A string at the 5th fret with the open E string. Adjust the tuning peg on the E string until it matches the pitch of the A string at the 5th fret.
Step 4: Tune the C String Using the E String
Next, use the E string to tune the C string. Press the E string down at the 4th fret. The note you hear should be the same as the open C string. Adjust the tuning peg on the C string until the pitches match.
Step 5: Tune the G String Using the C String
Finally, use the C string to tune the G string. Press the C string down at the 4th fret, which produces the same pitch as the open G string. Adjust the tuning peg on the G string until it matches the pitch.
Step 6: Double-Check the Tuning
Once all strings are tuned, it’s always a good idea to go back and recheck each one. Since tuning by ear relies on relative pitch, the slight differences can affect the overall tuning. Double-checking ensures your ukulele is perfectly tuned.
Advantages and Disadvantages of Using a Tuner vs. Tuning by Ear
Advantages of Using a Tuner
Accuracy: A tuner provides precise readings, making it easy to get your ukulele perfectly in tune.
Convenience: It’s quick and easy, especially for beginners who might not yet have a trained ear for pitch.
Consistency: Tuners are reliable and consistent, so you can be confident that your ukulele is tuned correctly each time.
Disadvantages of Using a Tuner
Dependence on Technology: Using a tuner means you rely on external tools, which can be inconvenient if you don’t have one available.
Lack of Ear Training: Relying too much on a tuner may hinder the development of your musical ear.
Advantages of Tuning by Ear
Ear Training: Tuning by ear improves your ability to distinguish different pitches, which is a valuable skill for any musician.
Self-Sufficiency: You can tune your ukulele anywhere, even without access to a tuner, as long as you have a reference pitch.
Disadvantages of Tuning by Ear
Time-Consuming: It can take longer to tune by ear, especially if you’re new to the process.
Inaccuracy: Without a reference note, it’s easier to get the pitch wrong, which can affect the overall sound.
Tips for Maintaining Ukulele Tuning
Tuning your ukulele is important, but maintaining its tuning over time is equally essential. Here are some tips to help keep your ukulele in tune:
Store Properly: Ukuleles are sensitive to temperature and humidity changes. Store your ukulele in a cool, dry place to prevent the strings from loosening or tightening due to environmental factors.
Use High-Quality Strings: Invest in good-quality strings for better tuning stability. Poor-quality strings are more likely to lose their tuning or snap.
Tune Before Playing: Even if you think your ukulele is in tune, it’s always a good idea to check before each practice session.
Stretch New Strings: When you install new strings, they often need some time to stretch and settle. Be prepared to tune them several times over the first few days.
Conclusion
Tuning your ukulele correctly is an essential step in making sure it sounds its best. Whether you choose to use a tuner for its ease and accuracy or decide to challenge yourself by tuning by ear, both methods are valuable. Tuning by ear improves your musical skills, while a tuner provides quick and reliable results.
By learning to tune your ukulele properly and maintaining its tuning, you’ll enjoy a better playing experience and progress faster in your musical journey. Happy strumming, and may your ukulele always sound its best!
Want to take your ukulele skills to the next level? Join The Mystic Keys and learn from world-class instructors. Whether you’re a beginner or an advanced player, our online lessons will help you master the ukulele with confidence. Start your musical journey today!
Related Blogs
How to Learn Ukulele Step by Step | A Comprehensive Guide
The ukulele is a delightful and accessible instrument that has become increasingly popular due to its cheerful sound, portability, and simplicity. Whether you’re picking up the ukulele for the first time or looking to refine your skills, taking the time to learn ukulele step by step will help you build a strong foundation.
Ukulele Sizes | Soprano, Concert, Tenor
& Baritone
The ukulele is a fascinating instrument with a bright, cheerful tone that has captivated musicians for generations. Originally from Hawaii, it has grown into a global favorite across various musical genres, from pop and folk to jazz and classical.
How Long Does It Take to Learn
the Ukulele?
The ukulele is often considered one of the most beginner-friendly instruments, yet it also offers incredible depth for advanced players. Its light, breezy tone and easy portability make it a popular choice for musicians of all levels.